Tuesday, December 22, 2009

Coffee Sacks at last!

During the past year or so of reading maya*made I've been inspired to try sewing/crafting with burlap. It's taken me a while to get to the coffee store to ask if they had any and then another two trips before I made it when a) they had some and b) the person with the right keys was in! I never guessed I would be so excited about some burlap! It's actually quite interesting to see the different graphics, words and fonts on the sacks.  I can't wait to turn these into great stuff!


My favourite part is this graphic on that last sack:

I'm not sure how I'll use it yet but I have it earmarked for something particularly terrific!

I have cut open one sack already and made a little bucket but unfortunately my camera battery died so I'll have get back to you with a picture!

Monday, December 21, 2009

Christmas Crafts - Part 2

A couple more of the crafts I've been working on.  These ones are gifts!

First up a little envelope pouch with a pair of felted candy canes inside.


And next a little boxy pouch:


That holds a pair of mini ornament earrings!  I was pleasantly surprised how well this tiny pouch turned out.


I have a few buttons to sew on some more envelope pouches that are destined for gifts and then I think I am done the gift crafting!  Just in time too!

On my Desk


Quick shot of my desk amid Christmas card making a couple weeks ago.  Lots of good stuff - stamps by Old Island Stamp Company, new chalk ink pads by Versa as well as Penny Black stamps and sparkle pens.  I had a great afternoon creating cards to send to friends and family.

Tuesday, December 15, 2009

Christmas Candy

I'm more of a baker then a candy maker but there have been a few confections coming out of the kitchen in the past few weeks.  First off I made candied orange peel...


So I could make this white chocolate bark (with candied orange peel and almonds):


Yummy!!

Then I made caramels.  Tried not to think too much about all the fat in the litre (yes, litre!) of whipping cream that went into making this pan:


Which then had to sit for 8 hours before being chopped up:


And wrapped in 192 little wax paper squares (we were environmentally friendly and ate some before they were wrapped to save the paper!)


The caramels have since been moved to a more festive tin but this bowl was what I had handy when I was wrapping them.

The last confection was filled dates.  The pictures didn't really do them justice as they look just like dates from the outside.  But inside!  A toasted pecan covered in caramel.  Delicious!  And almost healthy!  (Or so my mom and I tell ourselves as we eat them up!)

What have you been making?

Wednesday, December 9, 2009

In the Moment - December

It's over a week into the month and I am just now sitting down to write my post about December.  I didn't feel overly busy but maybe I was.  (And Giveaway Day didn't help, so many blogs to look at!)

On to December.  What I am mostly looking forward to this month is Christmas (in case you hadn't guessed already)!  Not just the 25th but also all the festivities before and after that as well as all the holiday things like baking and decorating trees.  Let's start the list with that:

  • Baking.  Last year I made 15 kinds of cookies.  A little overboard I know.  This year I have 10 types of cookies on the list (and a few moved over to the "January" to do pile).

  • Decorating trees.  Looking at all the ornaments collected over the years, watching the lights twinkle in the dark.

  • Wrapping presents.  Challenging myself to be more eco-friendly this year.  Hopefully sew some gift bags, if not work on using up the used paper in my closet.

  • Giving presents.  It makes me happy!

  • Singing Christmas carols. 

  • Remembering the time of Jesus' birth.  Those chapters in Luke seem more meaningful at this time of year.

  • Making and sending Christmas cards.  Using those sparkily Christmas stamps too!

  • Getting the mail.  I love mail and December has to be the best mail month of the year!

  • Longer days.  Not yet, but soon the days will start getting longer.

  • Relaxing.  Time off work, preparations complete, time to spend with family!

Monday, December 7, 2009

Christmas Crafts

I've been busy with Christmas crafts lately.  Lots of lovely tutorials to try as well as things that pop into my head.  Here are some felt ornaments from that lovely stash shown here:


So far each one is unique although two of the stars seem to been twins of a sort!

I tried out felt cafe's candy cane tutorial which I saw last year but didn't have the supplies for.  First I tried classic red and white:


Then I added a green stripe:


And had fun arranging them all for a photo:


This weekend was busy but very productive: baking, card making, tree decorating, present shopping, etc.  Didn't take many pictures although it was sunny (hooray!) and knew I would probably regret it later (i.e. when trying to take pictures in the dark/artificially lit indoors).

Giveaway Winner!


After consulting the random number generator we have a winner! Rosemeg who said: I love the little stars -- both the tacks and the paper wish stars. So sweet! 

Thankyou to everyone who left a comment reading all the nice things you said about my work made my day(s)!  I wish I could send something to you all but unfortunately my budget doesn't quite stretch to that!

Tuesday, December 1, 2009

December Giveaway Day!


This is my second time participating in Sew, Mama, Sew's Giveaway Day and I'm just as excited as the first time!  This is what I will be giving away:


  • Two mini scrapbook/notebooks
  • Set of 6 starry thumbtacks
  • Set of 16 fancy photo corners
The photo corners look like this:


To win this lovely set please leave a comment before midnight on December 6 about something on my blog or Etsy shop.  The winner will be picked by a random number generator.  I will ship internationally so everyone is welcome to participate!


Monday, November 30, 2009

It's beginning to look a lot like...

Christmas! 

A few of the Christmassy things around my house...


Paper wish stars have taken over my beach rock dish.


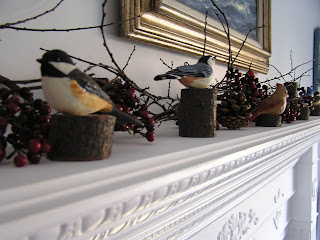
Birds have taken over the mantle.


And I'm enjoying this year's Christmas stamps from Canada Post.  Can't wait to put them on on Christmas card envelopes.  (I love the shimmery snowflakes that show up as you tilt them under the light.)

Saturday, November 28, 2009

Doll Clothes - Hooded Towel


This hooded towel would be perfect for use after having a bath or swimming.  It looks so cozy I almost want to sew one in my size!

 
What you need:

  • terry cloth (I used an old shirt that is only loopy on one side, this worked well for reducing bulk on such a small garment)
  • sewing machine or needle and thread


Step 1: Cut your fabric. 

 
If you are using an old garment and can cut your pieces along the hem use these measurements:

  • two body pieces: 10" x 12" (existing hem along a 10" side)
  • one hood piece: 6 1/2" x 12" (existing hem along a 12" side)


If you are using yardage of fabric use this measurements:

  • two body pieces: 10" x 12 1/2"
  • one hood piece: 7" x 12"


If you used the second measurements hem the one of the short edges on the two body pieces and one of the long edges on the hood piece.

 
Step 2: Sew the shoulder seams.
Match the two body pieces right sides together (hems at the same end!) and using a 1/2" seam allowance sew two inches in from each edge. 


Step 3: Sew and attach the hood.
Fold the hood piece in half lengthwise, right sides together, so the hemmed edge folds on itself.  Pin and sew the opposite side.


Turn the hood right side out and pin it to the body piece.  I took photos of this step but they are more confusing then helpful so bear with me, this bit is wordy!  First, find the centre back of the neckline and mark it with a pin or a dot from a dissapearing fabric marker.  So far there has been no front or back to this garment so just pick a side.  Now match the seam you just sewed (the back of the hood) to this mark and pin in place.  The raw edges should match up and the bulk of both pieces should be hanging down.  Continuing out from this centre mark, pin the rest of the hood along the neckline.  When you're finished it should be something like this:


Sew a seam, 1/2" from the raw edge and remove the pins.

Step 4: Finish the neckline.
With your towel right side out and all attached find the centre front of the neckline and make a little snip down this line, about 1" starting from the raw edge.


Fold back the fabric on either side of the snip and sew the resulting triangles down.  Cut off the flappy bits after you've made your seam.  (The picture shows the seam before I cut off the extra bits.)


Step 5: Finish the edges.
Turn under 1/2" along each long side, pin and sew. 


You can finish here or add a little modesty by closing the sides - fold your towel in half lengthwise (so it looks as it will when it will be worn) and sew along the middle of the "side hem" for about 3 inches leaving a space for the arms to go and a flap at the bottom. 


And you're done!  Your doll is now ready for the beach, pool or bathtub!

Thursday, November 26, 2009

Giveaway Day!


Have you heard?  Sew, Mama, Sew is having another Giveaway Day!  Beginning December 2nd and running until December 6th all sorts of amazingly crafty and creative people will be giving away wonderful prizes.  Visit Sew, Mama, Sew for more details and be sure to check back next week for my giveaway!

Tuesday, November 24, 2009

Etsy!

I'm so excited - I just finished setting up my Etsy shop.  It's been in process for a long time... I started playing around with product possibilites in the spring!  A few weekends ago we had some sunshine and I got the pictures taken (now that the days are short there's no hope of taking good photos before or after work).  Tonight I had time to set up my shop and get some listings up.  More to come over the next couple days.  Also another tutorial on doll's clothes and new on the Christmas crafts I've been working on.

I almost forgot - if you want to have a look at my Etsy shop you can find it here:
http://lauraarual.etsy.com/

Tuesday, November 17, 2009

Christmas Inspiration


I've collected a wonderful variety of materials (felt, thread, beads) in Christmas colours that are sitting in my workbox ready to be made into ornaments.  I'm thinking of trees, holly, bells and stars.  Maybe each one will be different, maybe some will be the same, I don't know yet.  Some may become gifts but I think I may get too attached to give them away!

Madness

Here's what kept me busy most of October and into November...


A 39 piece wardrobe for my cousin's Cabbage Patch Kids!  I had a lot of fun designing and sewing my first "collection" and now I am happy it's done and I can pack it up and move onto other (more festive) crafting.  And I've regained desk space.  And I can see my floor again!

When did the madness begin?  In September when my cousin was here visiting (we live 5 provinces apart so I don't see her nearly as often as I'd like to) and requested, as she always does, to play with my CPKs.  I also got out their wardrobe and she kept busy dressing and redressing the dolls as they went through a variety of activities.  At one point she made a comment about how much she liked the backpack and I could see she was thinking her CPK would like to have one.  So I thought I would sew her an (improved version) backpack and send it out.  I mulled this idea over for a few days and thought maybe I would add some clothes in as well.  A message to my aunt confirmed that some CPK clothes would be very welcome as they haven't been able to find any in stores and my cousin has to be satisfied with changing her CPKs into an old baby shirt or nothing at all.  And so I began.  And kept sewing.  And cutting.  And sewing.  With a little knitting thrown in until I finally said enough!  Which was after I'd made:
  • 2 pairs underwear
  •  1 pair of tights
  • 4 pairs of pants
  • 5 t-shirts
  • 2 skirts
  • 1 blouse thing
  • 1 hoodie
  • 2 rain jackets
  • 1 pair rain pants
  • 1 winter coat
  • mitts and a scarf
  • 2 pairs of pyjamas
  • 1 nightie
  • 2 pairs of shorts
  • 1 bathing suit
  • 1 hooded towel
  • 6 dresses
  • and the backpack that started it all
In a way, sewing these doll clothes has been a bit of a continuation of a family tradition.  Most of my CPK clothes came from my grandma (the one I share with this particular cousin).  Often when we went for our family vacation at my grandparent's cottage my grandma would have some new clothes for my and my sister's dolls.  A good deal of my CPK wardrobe was made by Nana and playing with our Cabbage Patch Kids was one of my & my sister's favourite things to do.  Nana passed away several years ago and so now I'm the one sewing the doll clothes.  Which is part way to fulfulling my 5-year-old self plan of becoming a grandma when I grow up "because they get to bake cookies and make doll clothes."  A good ambition, no?

Saturday, November 14, 2009

Around Town

I felt like I experienced three different seasons while I was out today...


Fall leaves against an autumn sky.


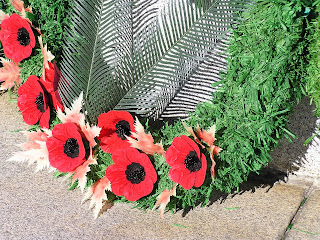
Poppies from Remembrance Day.


Snowflakes getting set for winter.


Signs of Christmas.

And it felt like spring - warm enough to be outside without a coat or sweater!  A wonderful combination!

Tuesday, November 10, 2009

Doll T-shirt Tutorial


I meant to have this up earlier but I forgot to take pictures when I was sewing a week ago and with the daylight disapearing so early these days I had to wait for the weekend to get some decent shots!

What you need:
  • knit fabric (an old T-shirt will do nicely!)
  • serger or sewing machine (serger preferred, needle and thread would do in a pinch)
  • pins


Step 1:
Print off the pattern.  It should fit a letter size (8 1/2" by 11") piece of paper.


Step 2:
Cut out your pieces.  You need two sleeves, two body pieces and a strip for the collar.  Ideally the bottom of the body pieces and a long edge of the sleeve pieces gets cut along the hem of your T-shirt.  (If not, don't worry, see the notes at the end of the post.)


Step 3:
With right sides together, match up your body pieces and serge the shoulder seams.


Step 4:
Measure around the neck opening and cut a piece of collar the same length plus a 1/2" seam allowance.  You can measure with a measuring tape but I just used the collar piece to measure, added the seam allowance and cut.  With right sides together serge along the short ends of the collar.


Step 5:
Fold your collar in half, wrong sides together, to make a thinner circle.  Pin this in place against the right side of the shirt...


And serge around.  Be careful to keep the rest of the shirt away from the knife!!  When you're done it should look like this:


Step 6:
Lay your shirt out flat, right side up and pin a sleeve to an armhole, keeping right sides together and the nice hemmed bit at the opposite end of the armhole!


Serge this seam and repeat for the other sleeve.

Step 7:
Fold the shirt in half, right sides together, and pin the side seams lining up the hem of the arm and the hem of the body.  Do this on both sides.


Serge both side seams and you're done!

Notes:

  • If you can't cut your pieces from the hem of a T-shirt or other garment don't worry!  Add about 1/2" to the length of the sleeve (which is the width of the rectangle) and the bottom of the body.  Hem the sleeves before you start and the body at the end.
  • This shirt could be made without a serger but it keeps the seams nice and stretchy for getting over large heads.  If you're using a sewing machine try a zig zag stitch which has more give then a straight stitch.
  • Have fun embellishing if you wish!  Freezer paper stencilling, applique, embroidery would be nice additions to the shirt.