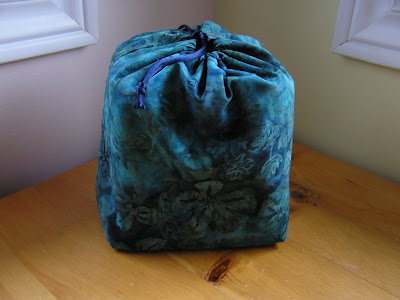
I designed this bag for a friend who is a dance teacher and carries CDs around with her so it’s sized to fit 10 CDs but if you don’t have the need to tote CDs around with you it would work equally well for carrying other stuff! There’s batting part way up to give it some structure but the top part is unstiffened so it can fold down like a cuff and turn your handy-dandy drawstring bag into a fabric basket. Let’s get started!
Step 1: Cut out the pieces. From the outer fabric cut a piece 11 by 23 inches. From the lining fabric cut a piece 11 by 21 inches. From quilt batting cut a piece 11 by 17 inches.
Step 2: Fold the outer piece, right sides together, so the short ends match up with each other. Fold the quilt batting around it so the centre fold of the batting lines up with the centre fold of the outer fabric. Did that make any sense? Hopefully the picture clarifies it all! Now sew up the side seams leaving 1 ½ inches unsewn at the open end. I used a ½ inch seam allowance for all seams.

Take the lining fabric, fold it in half, matching up the short ends and sew up the side seams all the way to the top.

Press all the side seams, including the unsewn bits, open as best you can.

Step 3: Fold the outer fabric/batting piece so that the side seam lines up with the centre fold and creates a corner. Pin in place. Measure 2 inches up from the corner, make a mark and draw a line across.


Sew across the line you drew and cut off the excess. Repeat for the other 3 corners (another outer/batting one plus the two lining ones).


Step 4: Turn the lining piece right side out and stuff it inside the outer piece. Line up the raw edges and pin together. Make sure to pin the side seams securely so the outside piece stays nice and aligned. Sew around the edge leaving a gap of a couple inches so you can turn the whole thing right side out when you’re done. Press the seam allowance towards the lining.


Step 5: Turn the whole thing right side out!
Step 6: This is a bit fiddly: making the drawstring casing. Fold the top seam about ½ an inch into the lining so outer fabric makes the top bit of the lining. Sew around the bag ½ an inch from the top edge to form the drawstring casing. (Sorry, I forgot to take a picture of this part. If you're confused try looking at the finished product pictures below and maybe that will help.)
Step 7: Thread a cord through the casing and knot to secure. I had knots at both ends but you could do a knot on one end only.


Step 8: Enjoy your bag!
I hope you liked (and understood!) this tutorial. If you try it I’d really appreciate hearing how it goes (and maybe pictures?).


Hi Laura, I saw your drawstring on One Pretty Thing and came over to take a look! (One of my knitting patterns was featured on the same post, I feel so lucky!) Anyway, I like your blog and really love this tutorial and want to try it. Thank you!
ReplyDeleteI don't sew yet but I will keep this pattern to give it try when I feel confident enough to make something. Thanks for posting!
ReplyDeleteHello mate nnice blog
ReplyDelete