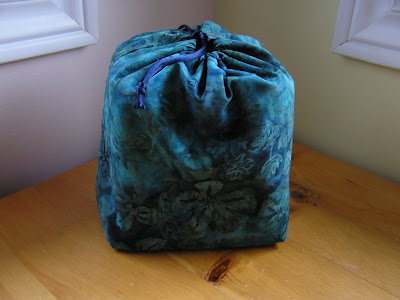
I needed a camera bag to go with the new DSLR. But I didn't really want an I Have A Camera In Here type bag so I decided to sew my own, basic drawstring bags with quilting batting for a bit of padding. I made one for the camera and another for the extra lens.
Closed up they look like this...
...and can go in a large purse...
...or a backpack.
Have yet to try them out but I think they'll work!
Showing posts with label bag. Show all posts
Wednesday, June 27, 2012
Monday, February 13, 2012
Crafternoon in February
This weekend I hosted a small crafternoon - just one friend; we were using my sewing machine so having just the two of us worked really well. We made these lovely zippy pouches from this tutorial on Skip to My Lou. Super simple instructions and going assembly line style we made 5 pouches in about 2 hours!
It was lots of fun to match & co-ordinate lining fabric, outer fabric & zippers! I forgot to get pictures of the linings but you can see some of the zippers in this photo.
I did remember to get some "action pictures" of me crafting! I don't think I've seen myself sewing before! In the other photo,s where my face is more visible, I look like I'm concentrating pretty hard!
Did you get up to anything crafty this weekend?
It was lots of fun to match & co-ordinate lining fabric, outer fabric & zippers! I forgot to get pictures of the linings but you can see some of the zippers in this photo.
I did remember to get some "action pictures" of me crafting! I don't think I've seen myself sewing before! In the other photo,s where my face is more visible, I look like I'm concentrating pretty hard!
Did you get up to anything crafty this weekend?
Sunday, May 29, 2011
Buttercup Bag
I'm sure some of you are familiar with Rae's Buttercup Bag pattern - it uses fat quarters, is quick, easy and free! It's been on my informal to do list for a while and this spring I found the perfect fabric for it! Actually when I bought the fabric I considered making another Birdie Sling but since I have 2 already I thought I'd go for something a little different.
I love it! Big bags are nice for carrying a water bottle, camera, umbrella, etc. etc. but sometimes a girl needs something a little smaller. Especially when wearing a summer dress (which it is finally warm enough for - hooray!).
And since turquoise is my favourite colour it will go with a lot of my clothes (um, and shoes & jewelry, what can I say, I know what I like!)
I made a few changes to the original pattern:
I love it! Big bags are nice for carrying a water bottle, camera, umbrella, etc. etc. but sometimes a girl needs something a little smaller. Especially when wearing a summer dress (which it is finally warm enough for - hooray!).
And since turquoise is my favourite colour it will go with a lot of my clothes (um, and shoes & jewelry, what can I say, I know what I like!)
I made a few changes to the original pattern:
- Interfaced the whole thing to give it more shape-holding capabilities.
- Adding piping between the two outer pieces.
- Made the inside pocket more rectangular & less square.
- Made the strap wider (which I was able to do since I was working with yardage and not a fat quarter).
Sunday, May 22, 2011
Giveaway Day!

I love Giveaway Days! They're really a win-win situation. You get a chance to win really cool stuff (last count I heard had over 300 bloggers giving things away!) and really cool blogs get new readers. What's not to like? Anyways, I know you're busy checking out all the neat stuff out there so I'll get down to business.
My giveaway is a rainbow zippy pouch like this:
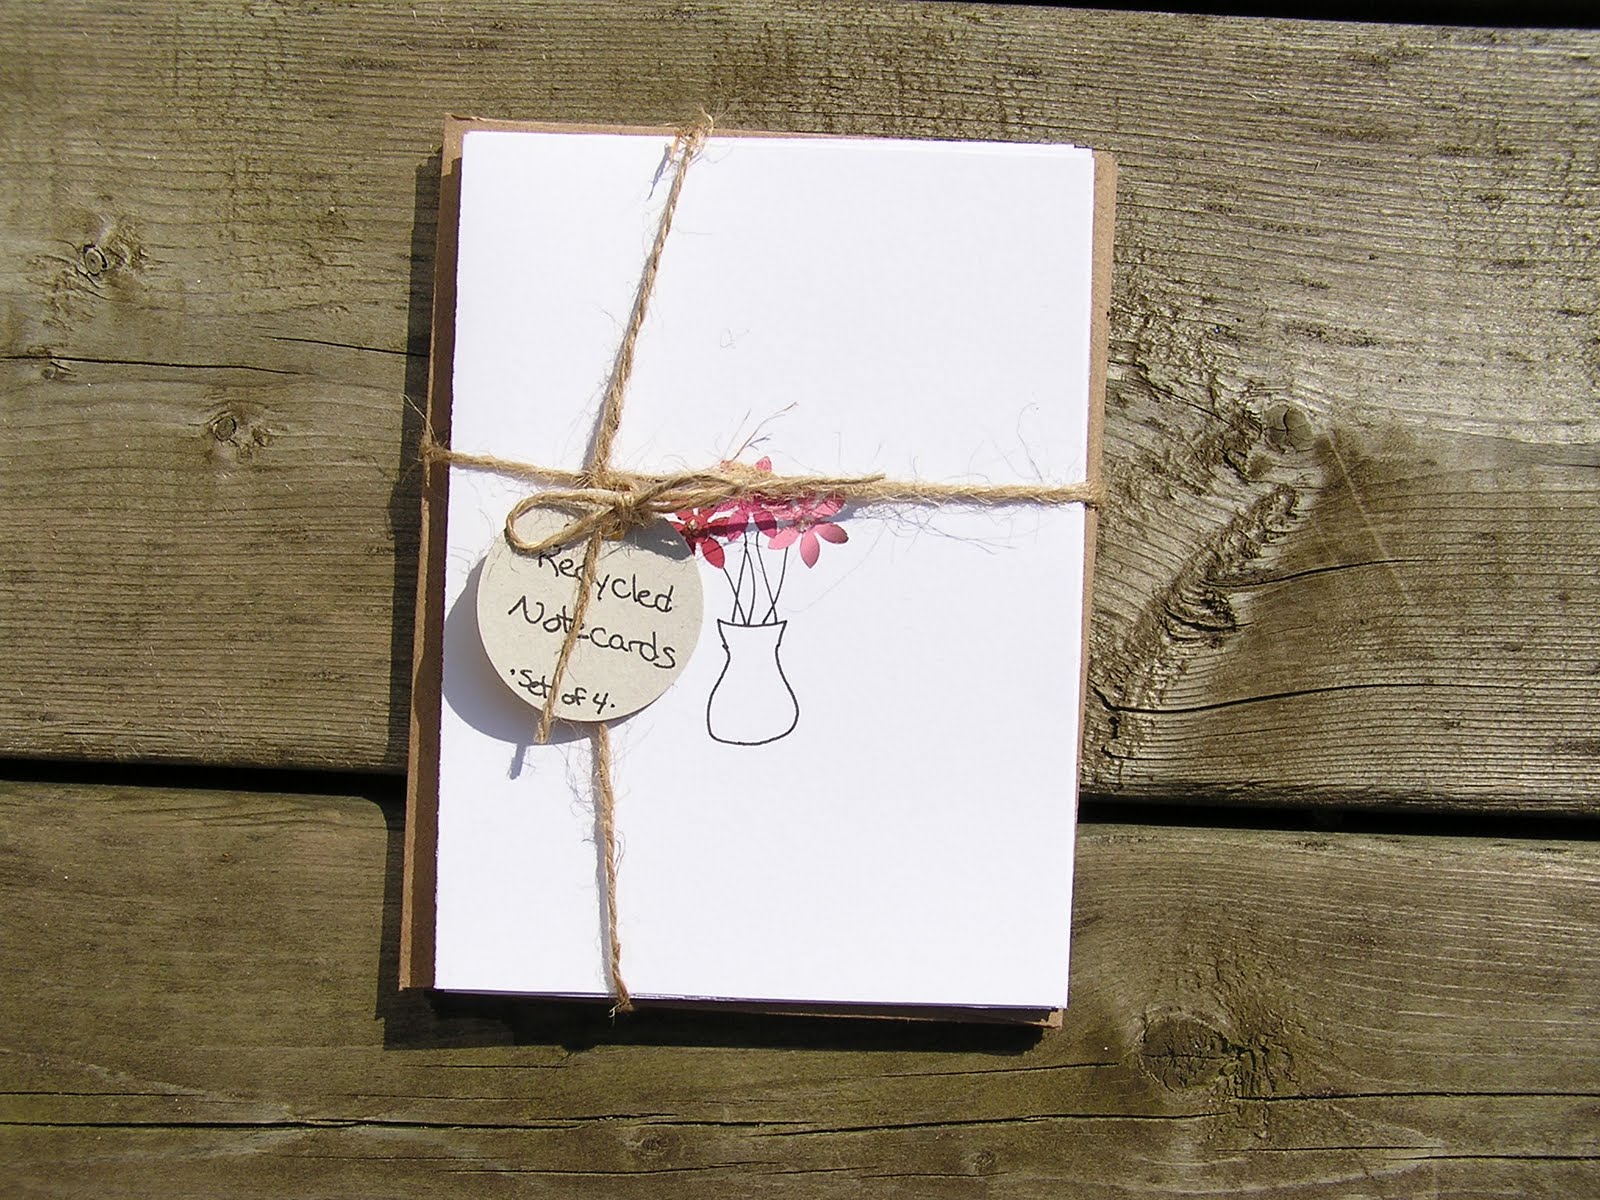
And a set of 4 recycled cards, like this:
To enter please leave a comment telling me where you're from. I will pick a winner with the wonderful random number generator on the evening of the 25th and ship the prize by the 30th. International entries welcome, I will ship anywhere!
P.S. If you don't win but would like a rainbow zippy pouch or some recycled cards come back in a few days for my Etsy shop opening!
Sunday, April 25, 2010
Handmade Ziplock Bag
If you've travelled by air recently (and even if you haven't) you're probably aware of the liquid restrictions: less then 100 ml, in a ziplock bag and all that. I thought it would be fun to make my own ziplock bag for travelling - it's small, clear and can close so hopefully it will make it past security with no problem (I'll likely have to wait till August to try that out though). In the interests of being Earth friendly (not that air travel is Earth friendly but every little bit helps) I do reuse my ziplock bag from flight to flight but they start to wear down after several uses. This bag is made from some thick plastic stuff (a huge pain to turn right side out as it sticks together!) which I'm hoping will last longer. Plus it's so much cuter then a plain old ziplock (at least I think so).
Saturday, January 16, 2010
Small Pouch Tutorial
I love my Birdie Sling but it does need some help in the organization department. Particularly for all those little things that can so easily get lost in the roominess of the Birdie Sling (bandaids, Tylenol, lens cleaning cloth, wet wipes, etc). I already have a couple envelope pouches stashed inside but I wanted something with a zipper to keep small bits contained. Enter the small pouch!
What you need:
What you need:
- Two pieces of fabric 6 by 4.5 inches (or whatever size you fancy really)
- Zipper longer then 6 inches
Step 1: Pin the fabric (wrong side down) to the zipper (right side up). The long edge of the fabric and the edge of the zipper should match with the fabric being roughly centered on the zipper. Sew as close to the zipper as you can get (along what is the upper edge in the photo), backstitching at each end.
Step 2: Fold the fabric back, away from the zipper, and press.
Step 3: Pin the second piece of fabric to the opposite edge of the zipper, sew in place, fold back and press as you did for the first piece of fabric.
Step 4: Top stitch along either side of the zipper. (Not really necessary but I like the finished look it gives.)
Step 5: Undo your zipper about half way (so you can get the pouch right side out after sewing!), fold your work in half along the zipper and pin in place.
Step 6: Sew along the three non-zipper edges, going back and forth a couple times at each end to secure the zipper. Clip the corners and cut off excess zipper.
Step 7: Turn the pouch right side out, press if desired, and enjoy!
Saturday, January 2, 2010
Goodbye 2009, Hello 2010!
I warn you this is a bit of a mish-mash of a post.
First off I have to show you the coffee sack bucket that I mentioned in the last post:
Also cute (possibly cuter) when the top is folded down.
For New Year's Day dinner I made these little matchboxes to put at each place...
And filled them with mini chocolate bars!
First off I have to show you the coffee sack bucket that I mentioned in the last post:
Also cute (possibly cuter) when the top is folded down.
And next, some felted rocks that I made for a very good friend.
For New Year's Day dinner I made these little matchboxes to put at each place...
And filled them with mini chocolate bars!
I used an old (i.e. 2009) calendar to make the box and wrapped them with pieces cut from a festive looking card.
2009 was a great year for crafting - I continued to develop my recent re-interests in knitting and sewing, started a blog, opened an Etsy shop and then the year culminated in with the madness of sewing an entire doll wardrobe as well as making lots of my Christmas presents!
What will 2010 bring? I have a craft "want to" list, some things leftover from 2009 (including those "it'll have to wait till after Christmas" projects), some new things and more yet to be discovered I'm sure! Alright, the 2010 Want-To List:
- Make the maple leaf scarves for which I needed the red fleece.
- Sew a pin cushion for my fancy new pins from Lupin.
- Try spinning with my drop spindle (which is carried over from the 2007 list!)
- Knit the mitts from the kit I got at the Knitter's Fair.
- Knit myself a scarf with "mint-chocolate" yarn, also from the Knitter's Fair.
- Scrapbook the photos from my trip to England.
- Experiment with paper garlands.
- Dye yarn & unspun wool (for felting/spinning.)
- Make a brooch, something felted I think, to wear on my new sweater (because the Christmas tree one isn't going to cut it anymore!)
- Try out LiEr's katybag pattern.
Well I guess that's enough to get me started! We'll see how much actually gets done!
Thanks for reading! (Which reminds me, one of my other "want tos" for 2010 is to blog more regularly.)
Wednesday, August 5, 2009
Weekend Crafting
Yes, it's now Wednesday and I'm just getting my weekend events blogged! In fairness, it was a long weekend here in Canada so my week only *started* yesterday... hmmmm... the rationalizations of a procrastinator!
First off, I wanted to sew something. Spent some time mulling over my fabric stash and imagining what to do with all that lovely fabric! (Do you notice a definite colour preference?)

I chose to use this canvas with elephants marching across it as well as some plain canvas and a bit of twill tape.

After some cutting, measuring, pinning and sewing.

I ended up with this little basket!

Perfect for keeping my current WIP in.

And I can fold up the handles and take it with me.

Very satisfying to finish a project the same day it was started! And lovely to sew by an open window with the breeze blowing in.
First off, I wanted to sew something. Spent some time mulling over my fabric stash and imagining what to do with all that lovely fabric! (Do you notice a definite colour preference?)
I chose to use this canvas with elephants marching across it as well as some plain canvas and a bit of twill tape.
After some cutting, measuring, pinning and sewing.
I ended up with this little basket!
Perfect for keeping my current WIP in.
And I can fold up the handles and take it with me.
Very satisfying to finish a project the same day it was started! And lovely to sew by an open window with the breeze blowing in.
Wednesday, July 22, 2009
Back to sewing
Yesterday I got back to sewing for the first time in over a month! (yikes!) I was surprised that it felt so satisfying. Partly due to the fact that I was able to finish this project in an evening I'm sure! Sometimes I forget, until I'm into a project, how good it feels to make something and even better, to finish it!
This little boxy pouch is a present for a cousin who loves frogs. My first boxy pouch turned out so well I've been itching to make another. Since I like to have a purpose for creating (and I can only use so many little bags) it's taken me a while to sew this second pouch. And sewing for my cousin was a great reason to bring home some of this adorable frog fabric!
I tried using interfacing on this one (I didn't on my first) so it turned out stiffer (obviously the effect I was after!) and maybe smaller? Does interfacing create the need for bigger seam allowances? Anyways I was very pleased with how it turned out.
Instructions for making your own boxy pouch can be found here:
Boxy Pouch Tutorial
I used this tutorial for information on making the lining. So basically I sewed the boxy pouch from the first tutorial with the addition of a lining as explained in the second.
Sunday, May 31, 2009
Drawstring Bag/Basket Tutorial
I designed this bag for a friend who is a dance teacher and carries CDs around with her so it’s sized to fit 10 CDs but if you don’t have the need to tote CDs around with you it would work equally well for carrying other stuff! There’s batting part way up to give it some structure but the top part is unstiffened so it can fold down like a cuff and turn your handy-dandy drawstring bag into a fabric basket. Let’s get started!
Step 1: Cut out the pieces. From the outer fabric cut a piece 11 by 23 inches. From the lining fabric cut a piece 11 by 21 inches. From quilt batting cut a piece 11 by 17 inches.
Step 2: Fold the outer piece, right sides together, so the short ends match up with each other. Fold the quilt batting around it so the centre fold of the batting lines up with the centre fold of the outer fabric. Did that make any sense? Hopefully the picture clarifies it all! Now sew up the side seams leaving 1 ½ inches unsewn at the open end. I used a ½ inch seam allowance for all seams.
Take the lining fabric, fold it in half, matching up the short ends and sew up the side seams all the way to the top.
Press all the side seams, including the unsewn bits, open as best you can.
Step 3: Fold the outer fabric/batting piece so that the side seam lines up with the centre fold and creates a corner. Pin in place. Measure 2 inches up from the corner, make a mark and draw a line across.
Sew across the line you drew and cut off the excess. Repeat for the other 3 corners (another outer/batting one plus the two lining ones).
Step 4: Turn the lining piece right side out and stuff it inside the outer piece. Line up the raw edges and pin together. Make sure to pin the side seams securely so the outside piece stays nice and aligned. Sew around the edge leaving a gap of a couple inches so you can turn the whole thing right side out when you’re done. Press the seam allowance towards the lining.
Step 5: Turn the whole thing right side out!
Step 6: This is a bit fiddly: making the drawstring casing. Fold the top seam about ½ an inch into the lining so outer fabric makes the top bit of the lining. Sew around the bag ½ an inch from the top edge to form the drawstring casing. (Sorry, I forgot to take a picture of this part. If you're confused try looking at the finished product pictures below and maybe that will help.)
Step 7: Thread a cord through the casing and knot to secure. I had knots at both ends but you could do a knot on one end only.
Step 8: Enjoy your bag!
I hope you liked (and understood!) this tutorial. If you try it I’d really appreciate hearing how it goes (and maybe pictures?).
Wednesday, February 18, 2009
Envelope Bag Tutorial
I like to be environmentally friendly when I can. When I found small bamboo sporks at an eco-store I thought they'd be great to carry in my purse to use for impromptu snacks instead of plastic cutlery. However, I didn't want my sporks rolling around in the bottom of my purse with who-knows-what so I made a little bag to keep them in (bonus: machine washable
This is my first tutorial so I'd love to hear if you use it and if it was easy to follow!
First, cut two shapes (rectangles with flaps) from fabric - I used different fabric for the lining and the outside but they could be the same. If you have an item to want to fit inside the finished bag take this into account before you cut!
Next sew the side seams on the rectangle leaving about 3/8" unsewn at the top (the end with the flap).
Turn the lining right side out and slip it in the outer envelope.
Stitch around the flap, adding a hair elastic at the peak to act as a button loop. This is the trickiest part - start on the straight edge (about 1 inch from the side seam), go over the side seam, around the flap, sew the hair elastic in (leave most of it sticking out on the wrong side) and back to the next straight edge. Be sure to leave enough room on the straight edge for turning right side out!!
(I got the hair elastic idea from Chickpea Studio's tutorial. What a great idea!)
Now your bag should look like this:
Turn it right side out through the space you left on the straight edge. Iron it nice and flat and sew the opening closed. I chose to topstitch along the length of the straight edge but you could also slip stitch the opening closed. Last thing to do is sew on the button. If you're keeping something bulky in your bag put it in and see where the hair elastic reaches to and sew your button there.
Ta-da! You're done! Enjoy your bag.
Subscribe to:
Posts (Atom)